As a cat lover and cat owner, I know how important it is to care for stray cats during the colder months. Winter can be harsh, and without a warm, safe place to rest, stray cats face a real struggle to survive.
This step-by-step guide is perfect for anyone looking to make a difference. It’s simple, inexpensive, and can be completed quickly. Whether you’re a seasoned DIYer or a total beginner, you’ll be able to build a cozy, insulated home to keep stray cats warm and dry this winter.
Disclaimer: This article contains affiliate links to Amazon products, which may earn us a small commission at no additional cost to you.
Why Are Winter Shelters So Important?
Feral cats face tough conditions in the winter—freezing temperatures, snow, and the constant search for food and shelter. Many don’t survive without our help. That’s why a simple DIY winter cat shelter can make all the difference. It keeps them warm, dry, and protected from predators.
One thing I’ve learned over the years is that insulation is key. The shelter traps the cat’s body heat, creating a warm microclimate inside. So using proper materials, like untacked straw (not hay!) and styrofoam for insulation, can make the shelter effective even on the coldest nights.
Materials You’ll Need:
Here’s what you’ll need to build this life-saving shelter:
- 2 Plastic bins with lids (one smaller, one larger, e.g., 18-gallon and 30-gallon)
- Styrofoam sheets or scraps (to insulate walls and floors)
- Untacked straw (for bedding; avoid hay as it holds moisture)
- Plastic plant pot (5-6 inches in diameter, for the entryway)
- Duct tape (to secure materials and weatherproof)
- Box cutter or X-Acto knife (to cut plastic and styrofoam)
- Heat gun or hair dryer (optional, for softening plastic)
- Sharpie marker (for tracing cuts)
- Cedar wood chips or bedding (to repel pests)
Step-by-Step Instructions to Build the Shelter
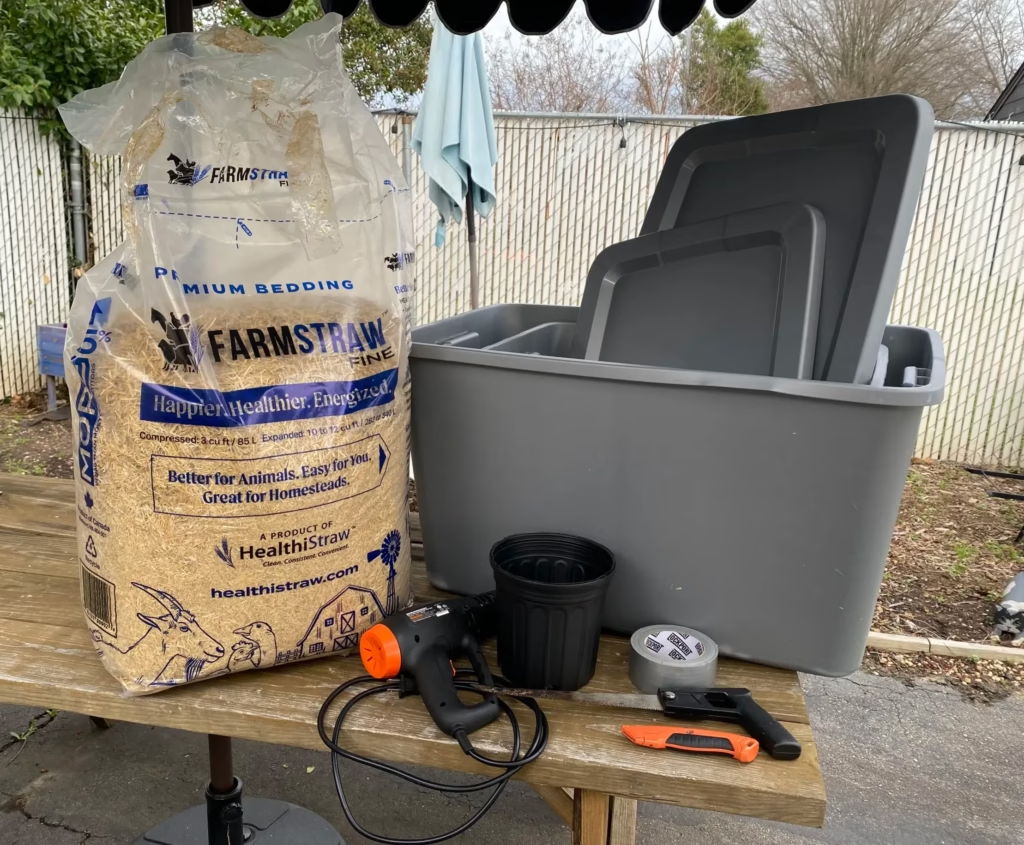
Disclaimer: All pictures used for this guide were originally taken by SPCA of Wake County
1. Create the Entrance:
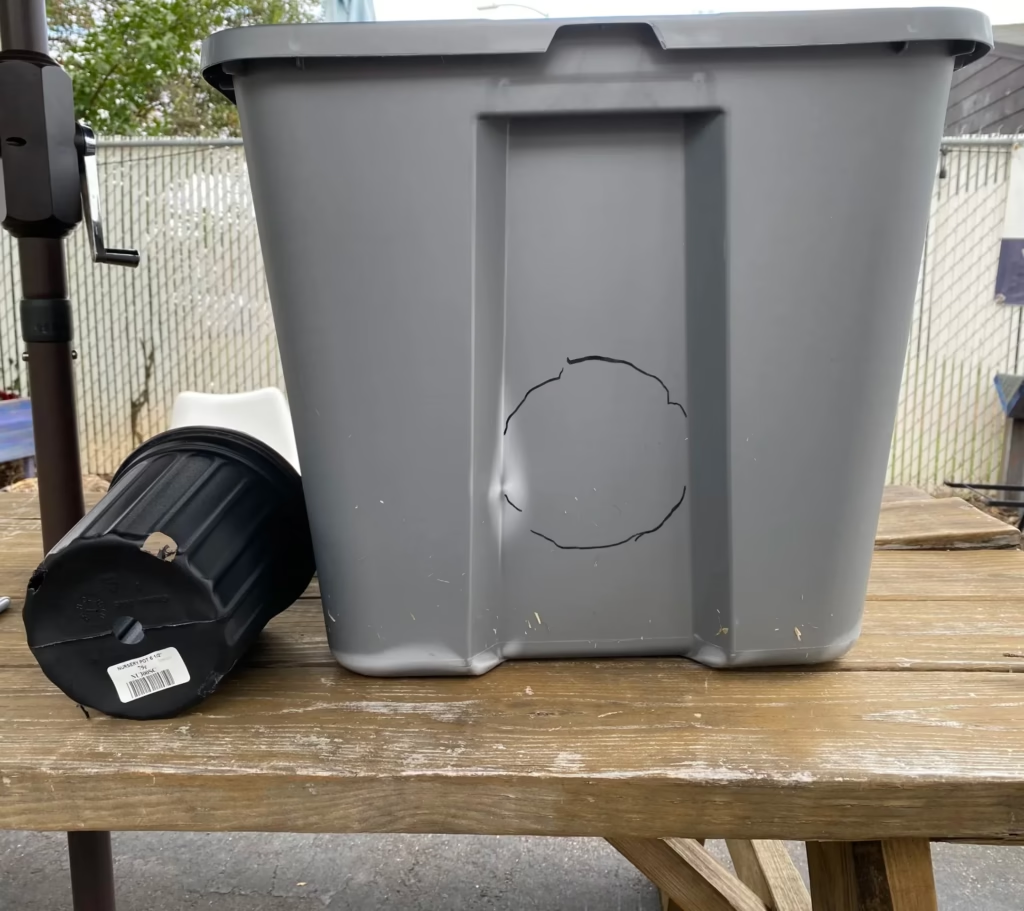
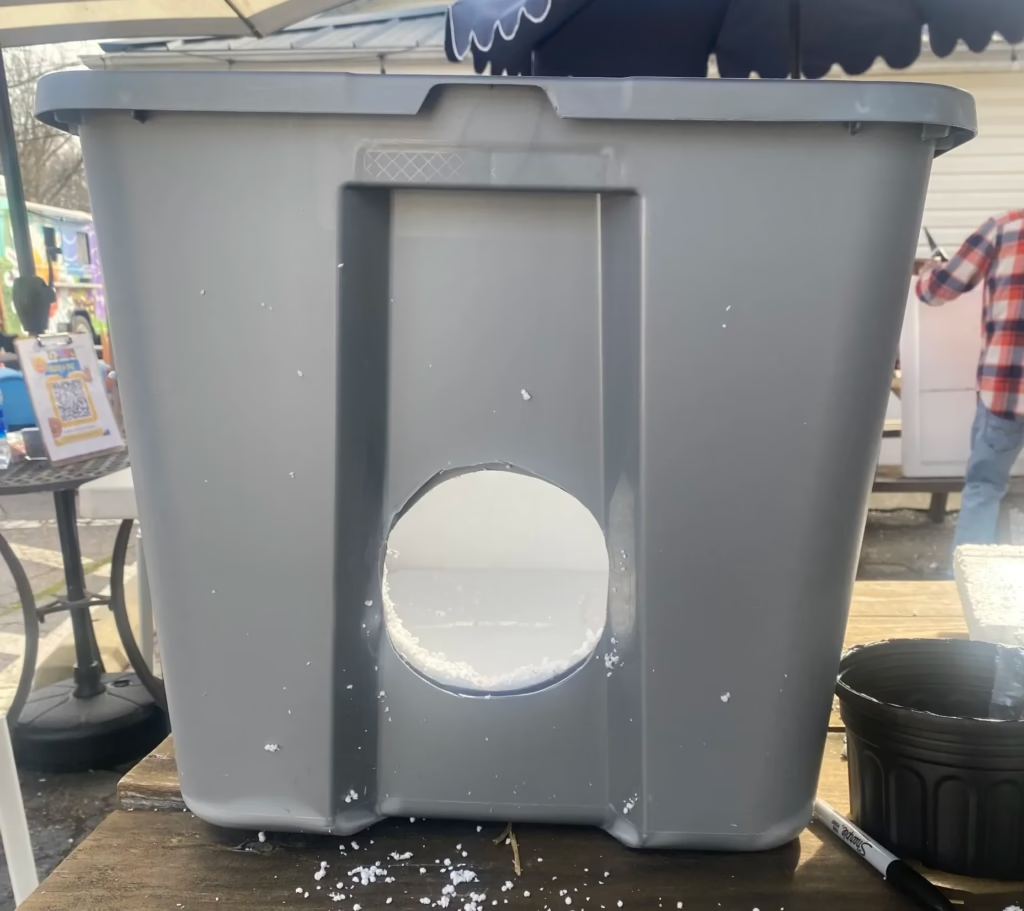
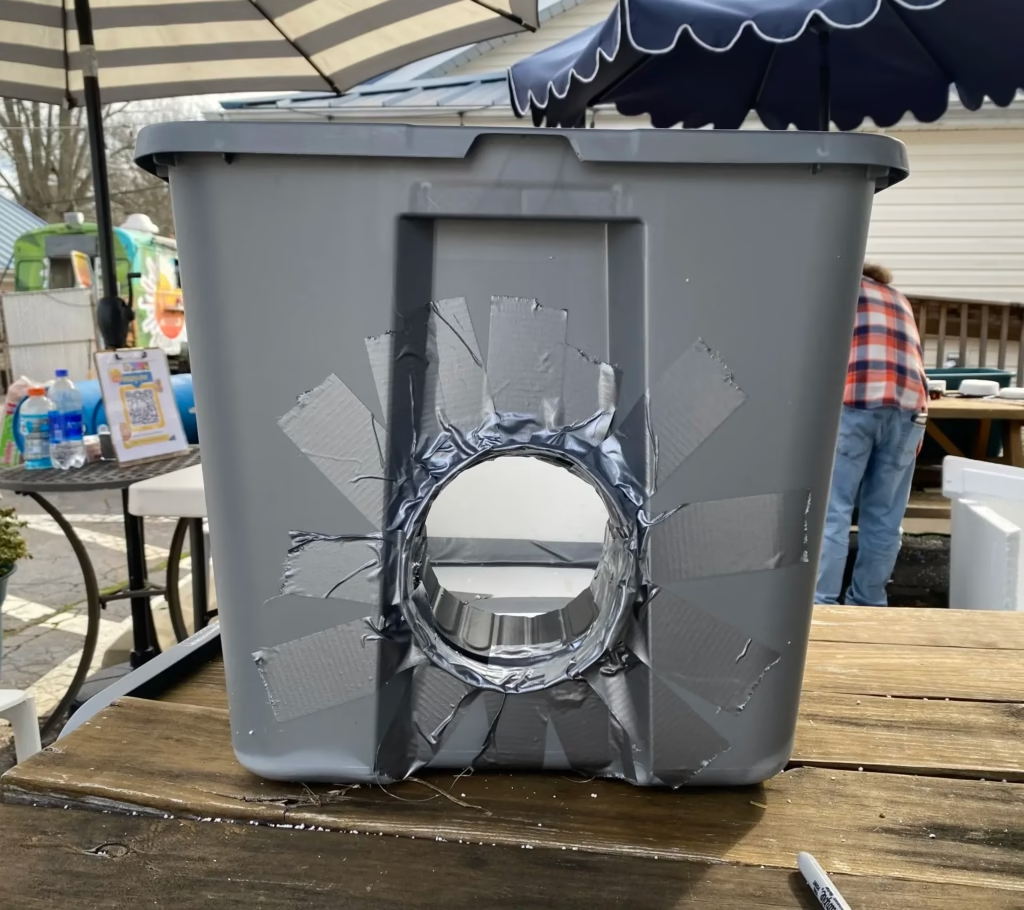
- Trace a circle on the large bin, a few inches above the base, for the entrance.
- Warm the plastic with a heat gun or hair dryer to soften it (optional).
- Carefully cut out the hole using a box cutter.
- Cut the bottom off the plastic plant pot to make a tube. This will act as a protected entryway.
- Test the fit and adjust the hole as needed to ensure the tube fits snugly.
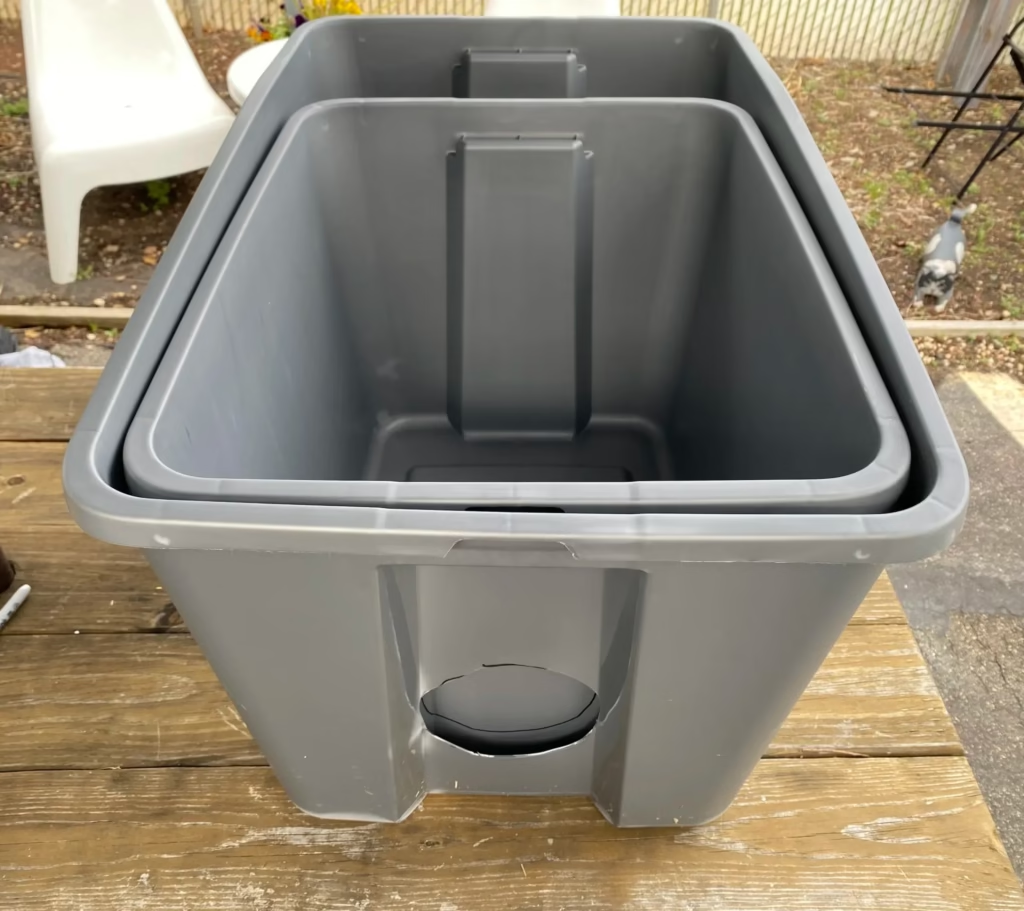
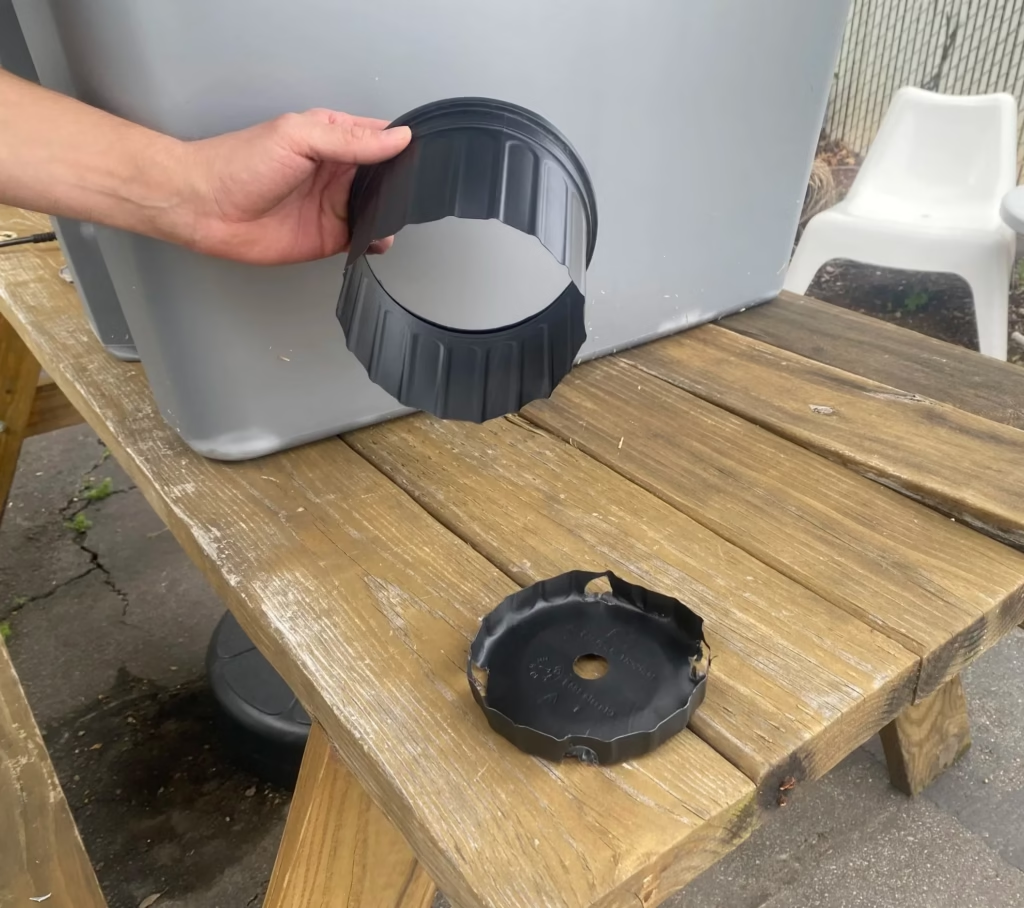
Before proceeding, check the entrance size and fit.
2. Insulate the Walls:
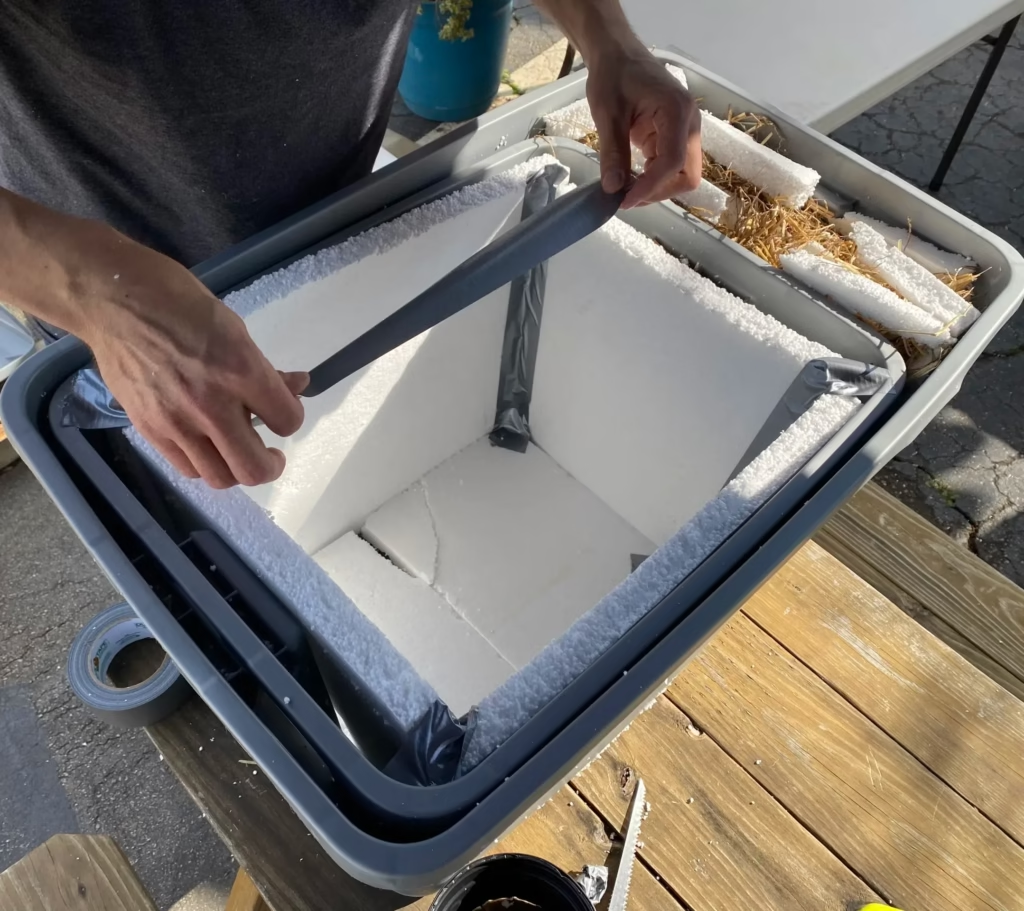
- Place the smaller bin inside the larger bin, leaving a gap between the walls for insulation.
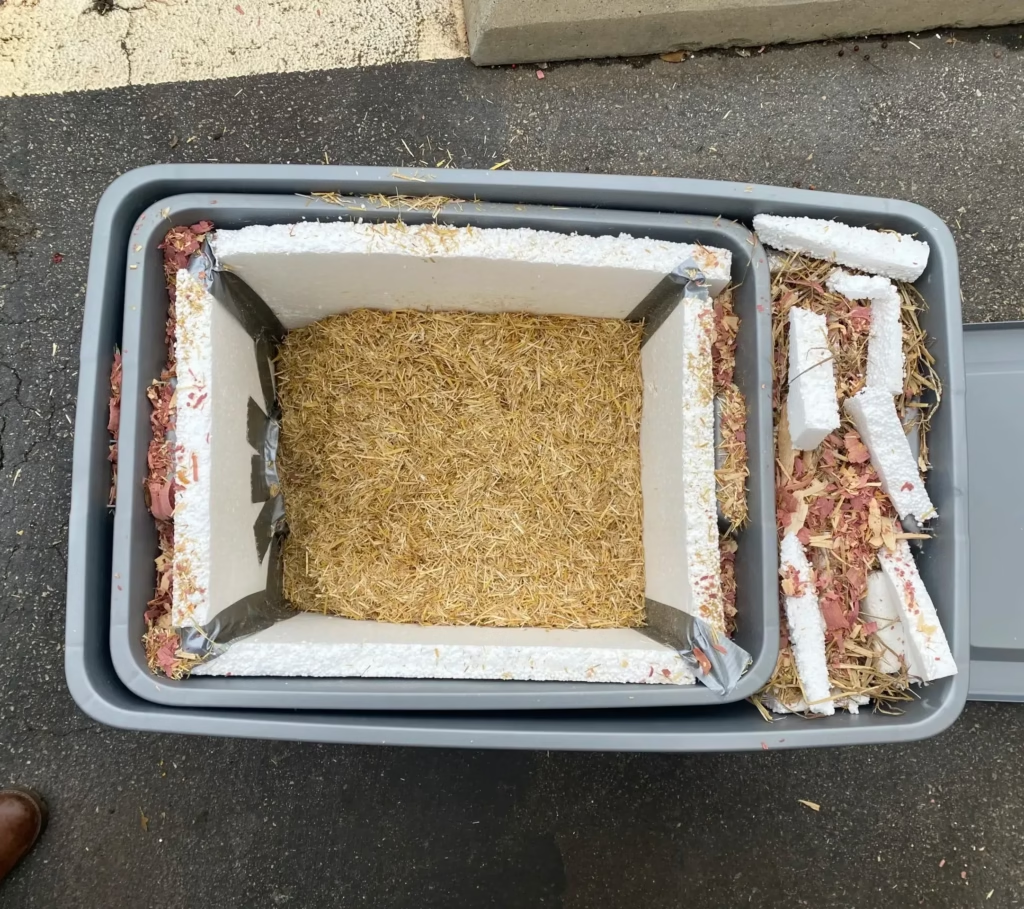
- Fill the space with styrofoam pieces and untacked straw, leaving small air pockets for better insulation.
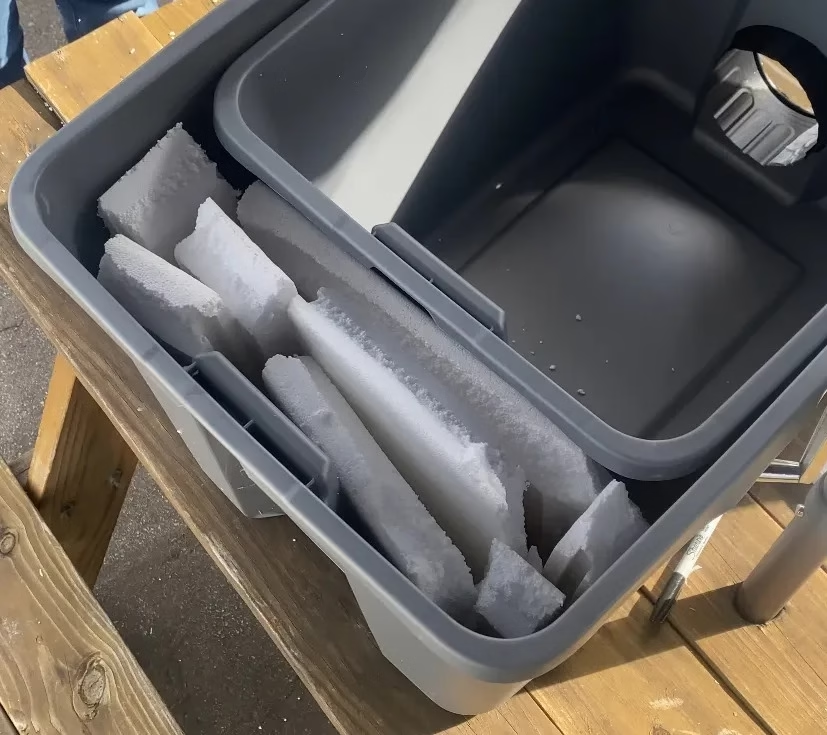
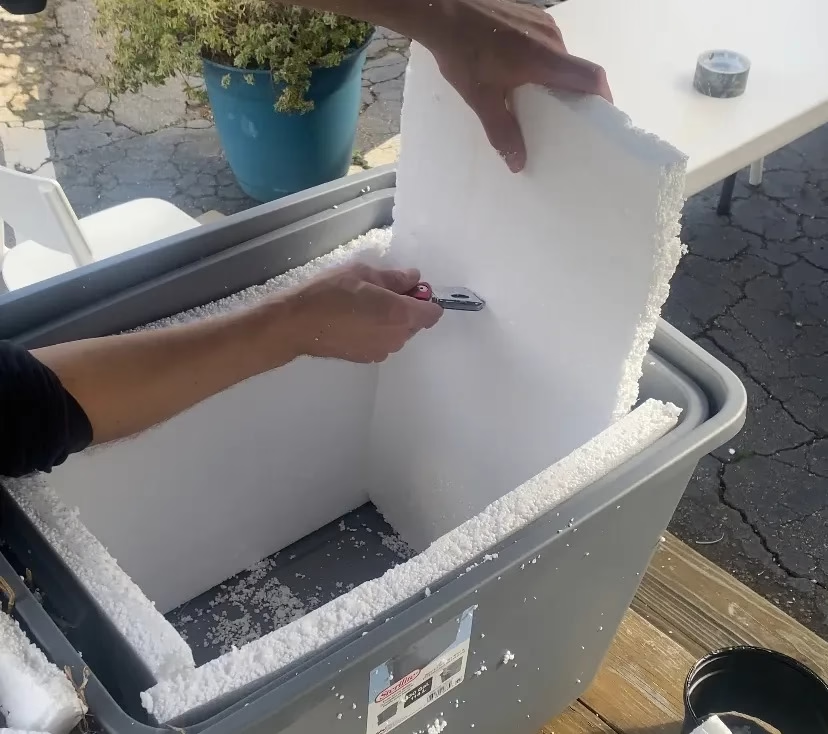
- Line the inner walls and floor of the smaller bin with styrofoam sheets.
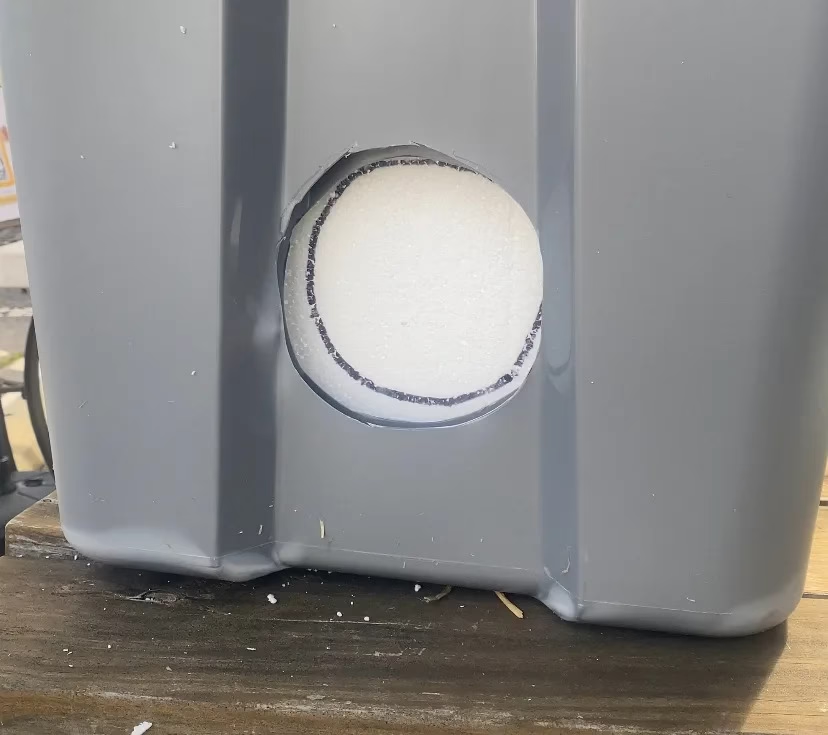
- Cut a hole in the styrofoam to match the entrance hole in the bin.
3. Secure the Insulation:
- Use duct tape to secure the styrofoam and seal any seams. This keeps everything in place and prevents drafts.
- Vacuum up any styrofoam bits to avoid cats accidentally eating them.
4. Assemble the Shelter:
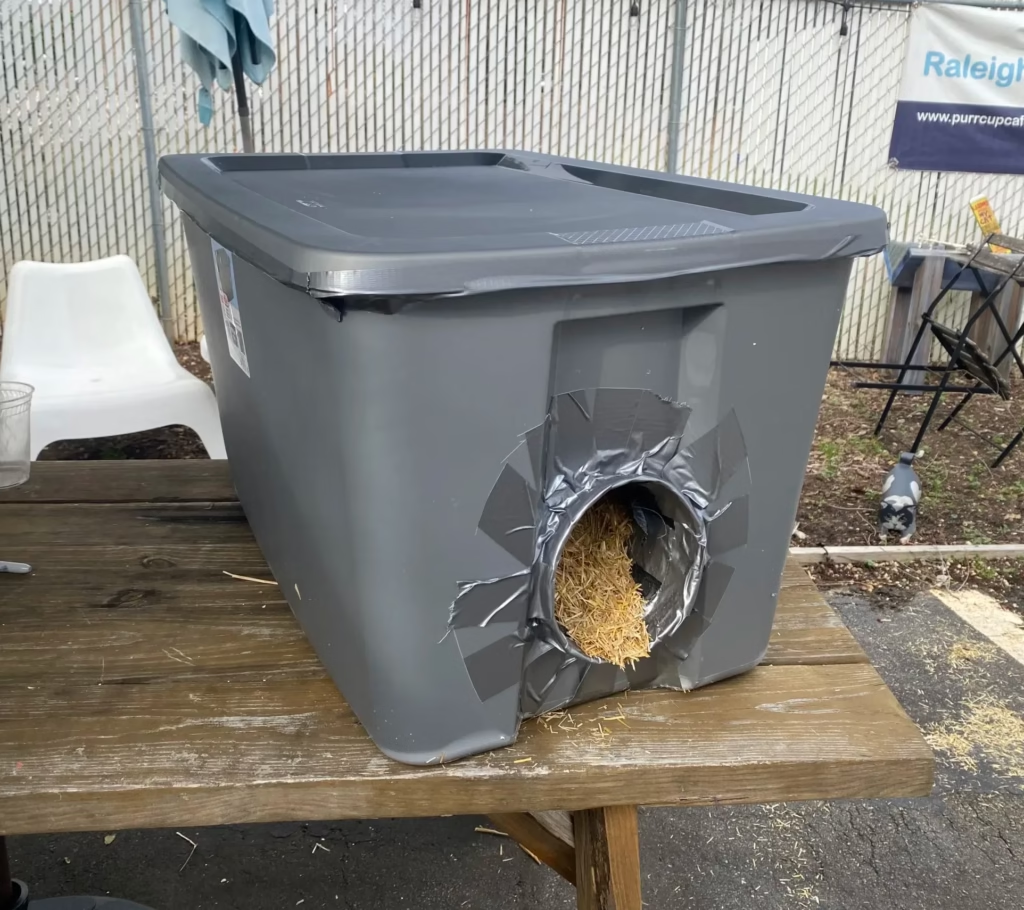
- Insert the entrance tube through both bins and the inner styrofoam wall. Let it stick out a couple of inches to keep rain and debris out.
- Secure the tube with duct tape, covering any sharp edges.
- Fill the inner bin with a thick layer of untacked straw for bedding. Sprinkle cedar chips to help repel pests.
5. Final Assembly:
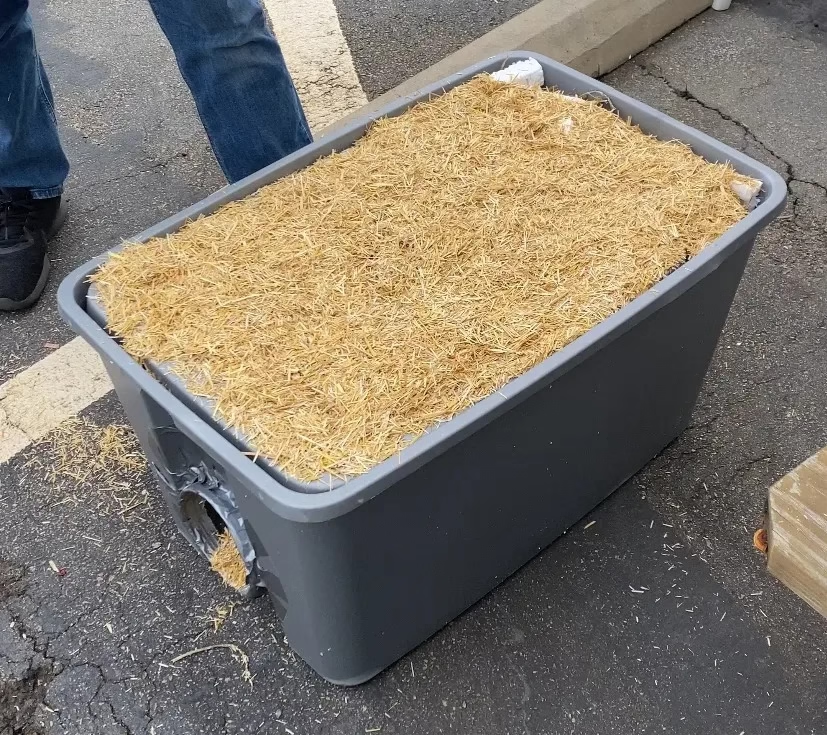
- Cover the smaller bin with its lid, then add more straw on top for extra insulation.
- Close the large bin with its lid and secure it tightly with duct tape. Your final result should be something like this:
Placement and Maintenance Tips
Once the shelter is built, place it in a quiet, hidden spot that stray cats frequent. I recommend areas near bushes, trees, or structures for added protection from wind and predators. Elevating the shelter slightly can also help prevent flooding, and camouflaging it with leaves or branches will keep it safe from unwanted attention.
Make sure you check on the shelter regularly. Replace the straw if it gets too wet to keep it fresh and insulating. And please ensure that the shelter remains sturdy and weatherproof throughout the winter.
More Helpful Products for Your DIY Cat Shelter
To make your shelter-building process easier, here are some recommended products:
These are great options for anyone starting this project for the first time.
Disclaimer: affiliate links to Amazon products may earn us a small commission at no additional cost to you.
Why You Should Do This for Cats Today
There’s no time to wait when stray cats need your help. Building a winter shelter is one of the simplest yet most impactful ways to protect them. I’m sure knowing that you’ve provided a safe, warm place for a cat to rest is an amazing feeling.
So, grab your materials, roll up your sleeves, and get started. The stray cats in your neighborhood will thank you!


